Agenda Lite module
last update 20.09.2023 (v1.0)
Created by Max Vorozhtsov (UX & Front-end) & Olha Vorozhtsova (UX & Designed by)
Requirements
Agenda free module requires at least one of the next HubSpot plans:
- Free Tools & CRM
- CMS Hub: Starter, Professional, or Enterprise
- Marketing Hub: Starter, Professional, or Enterprise
- Sales Hub: Starter, Professional, or Enterprise
- Service Hub: Starter, Professional, or Enterprise
- Operations Hub: Starter, Professional, or Enterprise
Installation
- Install the module into your the HubSpot instance from the HubSpot marketplace.
- choose the website / landing page where you want to place the module
- enter the page editor
- find the Agenda Free module in the "Add" tab and drag'n'drop module into the Landing / Website page content.
Technology
Possibilities
- Styles Tab
- changing the day view
- changing the font family for the module
- changing the font colors
- changing the decoration colors
- changing the presenter photo border radius
- possibility to add the max-width to the content
- possibility to change the event description width (desktop version only)
- possibility to change the padding top and padding bottom for the full agenda block
- popup styling:
- speaker name color
- speaker photo border-radius color
- popup z-index
- popup overlay z-index
- popup overlay color
- changing the base styling:
- change the popup background color
- change popup text color
- Content tab
- top content change
- Event title turn on/off
- Event title edition
- Event description turn on/off
- Event description edition
- day creation
- adding the day name
- enable/remove day subtitle
- items adding/removing:
- possibility to add event title
- possibility to add event time
- possibility to add event description
- possibility to add/remove event speaker
- add/remove the speaker photo
- edit the speaker name
- edit speaker job role
- possibility to add/remove company
- adding the custom styles for exact item
- change the background color
- change title color
- change the text color
- change speaker name & job title color
- change border top color
- Create the popup for speaker
- add speaker name
- add speaker job role
- add speaker photo
- add speaker description
- enable the box with the links (each can be turn on/off separately and the social network icon can be changed):
- linkedin link
- facebook link
- twitter / x link
- website link
FAQ
How to create more than one "day"?
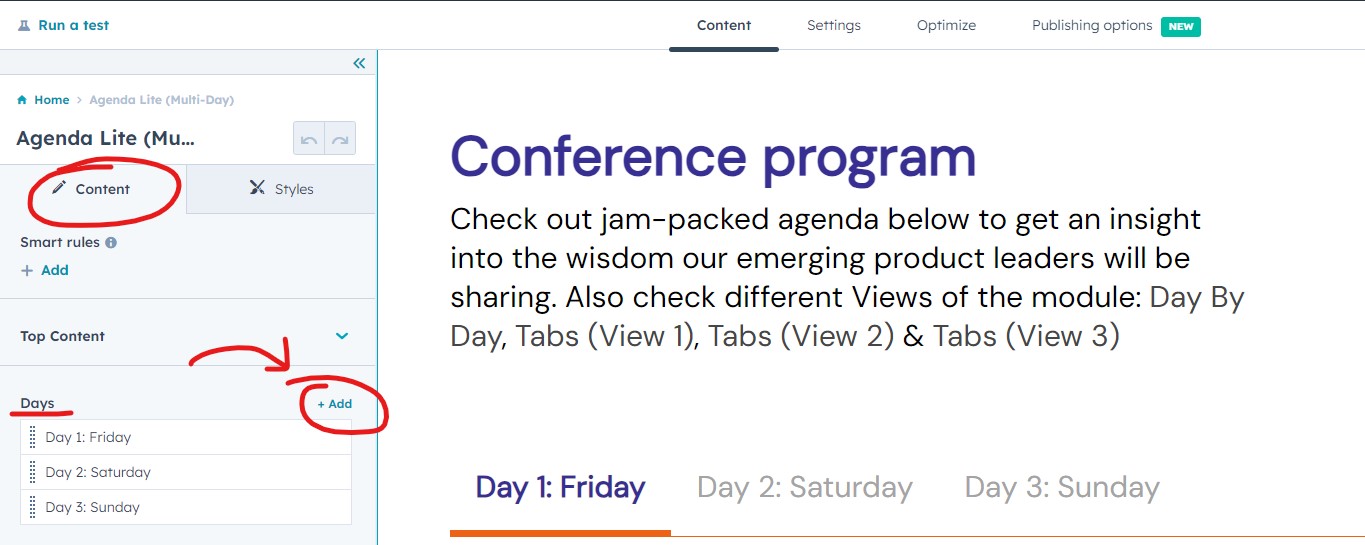
To create more than one day - go to the module content, find the "Day" group and click add:
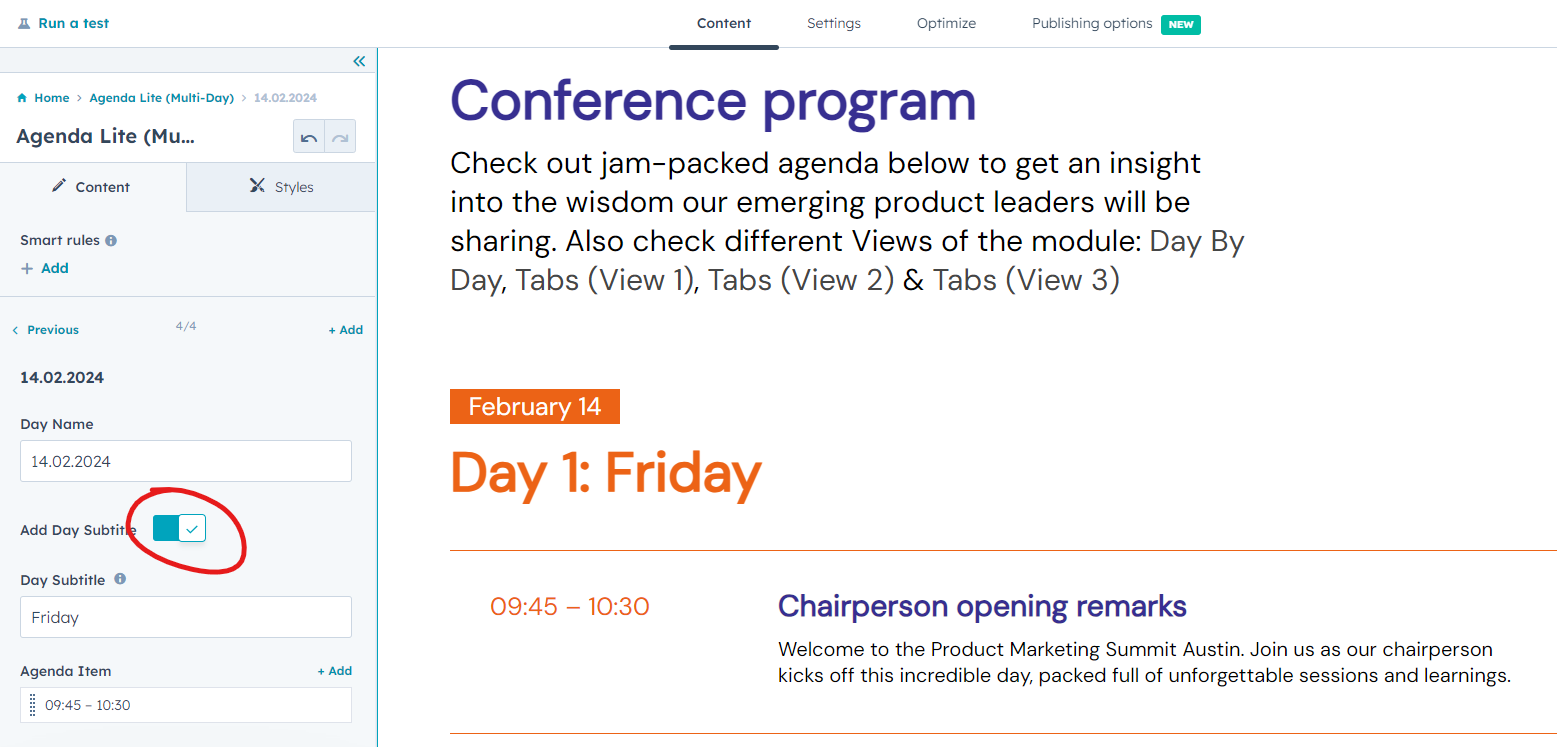
After the day was created you can add the day title and the events for exact day. In case you use day-by-day view - you can add also subtitle, just turn this option on:
How to switch the view?
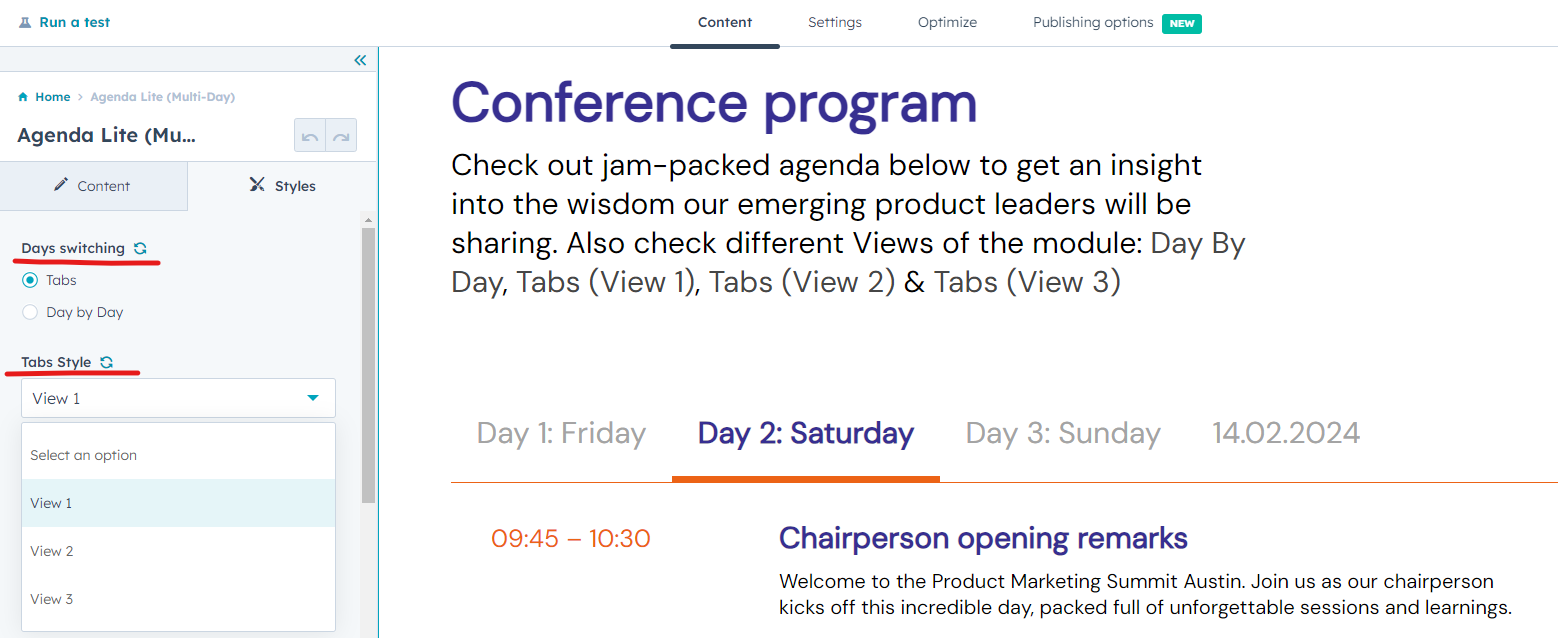
To switch the view go to the Styles tab and choose the view between the "Day by Day" view and "Tabs" view. In case you choose the "Tabs" view you can also choose one of 3 versions of tabs:
Demos for diffetent types of view:
How to create the Speaker Popup and connect it with the event?
To add the speaker popup you need to go to the Content tab and switch on such option and then click add:
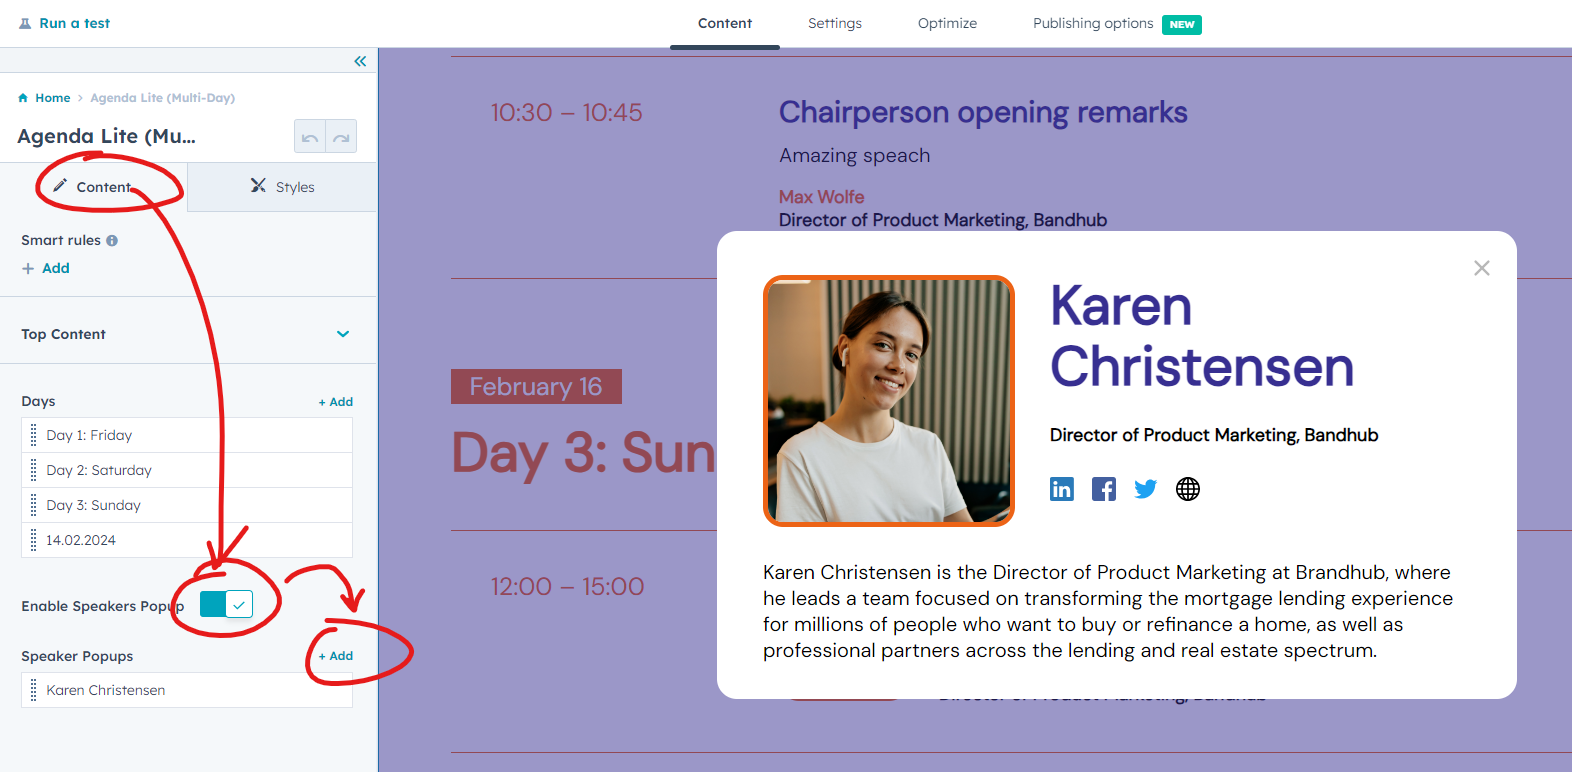
In the speaker's popup you can set speaker's name and photo (photo can be turned off), job title and social links (linkedin, facebook, twitter/x and website; each link can be turn off and each icon can be changed), also speaker description can be added.
Please not, that popup added to the evnt by speaker name, so the speaker name in the popup have to be the same as in the event item.
Example: we have 2 speakers (Max Wolfe and Karen Christensen), but just one popup created (Karen Christensen):
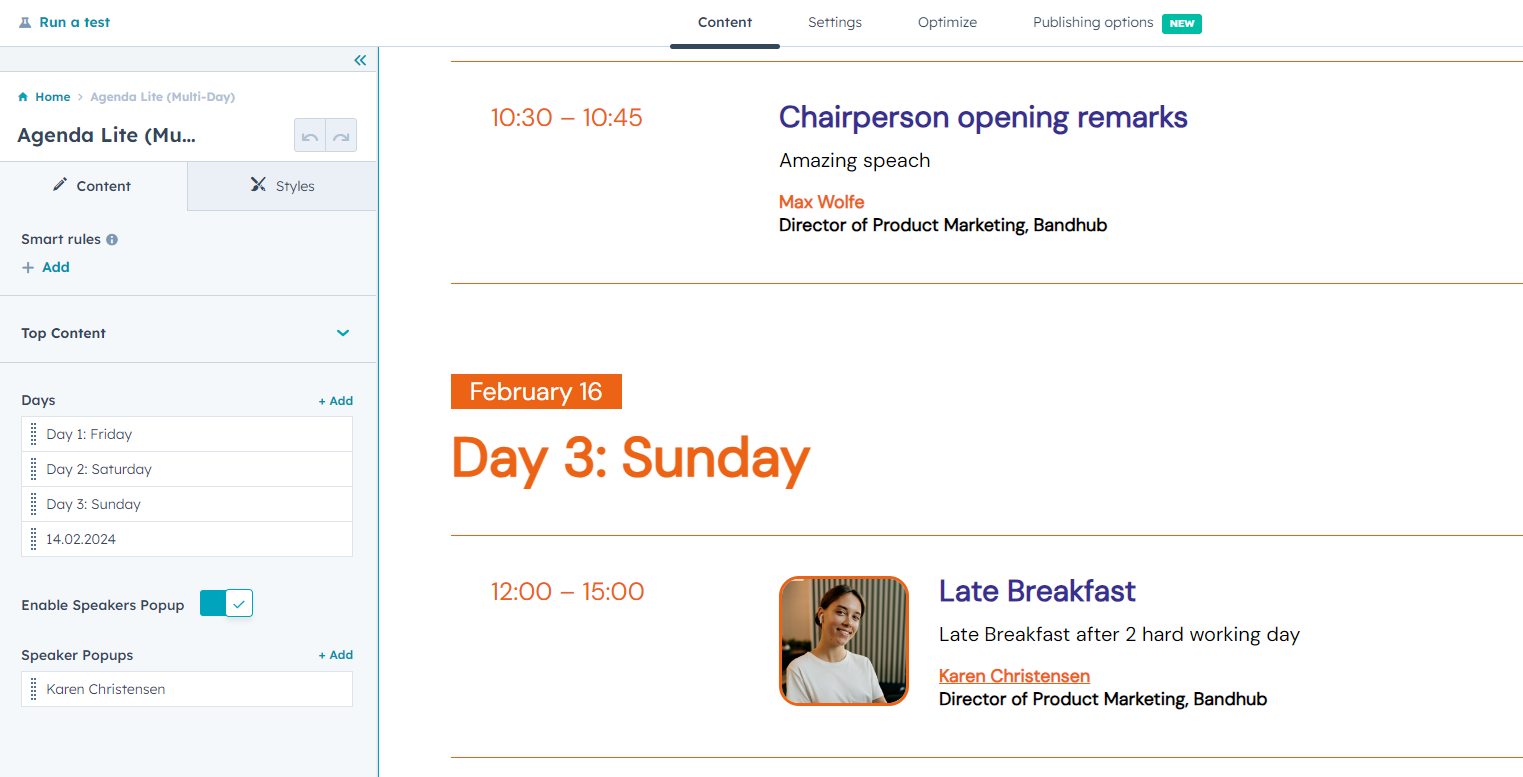
As you see, Karen's name is underlined and on click the popup will be shown (also on Karen's photo click), but the popup wasn't created for Max, and his name is not underlined. So, if popup for speaker was created in the correct way, the speaker name will be underlined.
In case of any questions - please reach out our support


